


How to Install SKF CR Seals?
A Comprehensive Step-by-Step Guide for Optimal Performance
Introduction
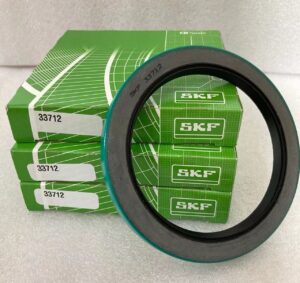
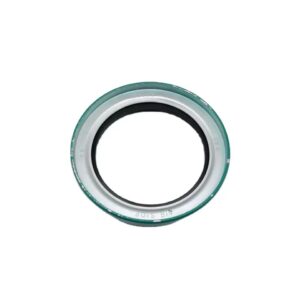
SKF CR Seals are critical components in industrial and automotive applications, designed to prevent lubricant leakage and protect against contaminants. Proper installation ensures longevity and reliability. This guide outlines essential steps, tools, and precautions for installing SKF CR Seals across various types, including general industrial seals, Scotseal PlusXL, Classic, and X-Treme/Pro models. Follow these procedures to achieve consistent, leak-free results.
1. Pre-Installation Preparation
1.1 Workspace & Safety
- Clean Environment: Work in a dry, debris-free area to avoid contamination. Dust or particles can compromise seal integrity.
- Personal Protective Equipment (PPE): Wear safety glasses and cut-resistant gloves, especially when using hammers or pullers.
1.2 Tools & Materials
- Seal Removal Tools:
- SKF SRT-1 puller for wheel-end seals.
- Seal pullers for industrial applications (avoid prying against the seal lip).
- Installation Tools:
- Hydraulic press with mandrel attachments.
- Soft-faced hammer, seal driver sets, and installation sleeves (thin-walled or stepped).
- Lubricant: Use the system’s retained lubricant (oil or grease).
1.3 Component Inspection & Repair
- Remove Old Seals: Use appropriate pullers; never pry against the sealing lip.
- Inspect Surfaces: Check the shaft and housing bore for nicks, grooves, or corrosion.
- Repair Damaged Shafts: Install SKF Speedi-Sleeve® wear sleeves on compromised shafts.
2. General Industrial Seal Installation
2.1 Pre-Lubrication
- Lubricate the shaft, seal lip, and housing bore with the system’s retained lubricant.
- Metal-cased seals: Light lubrication.
- Rubber-covered seals: Full lubrication is mandatory.
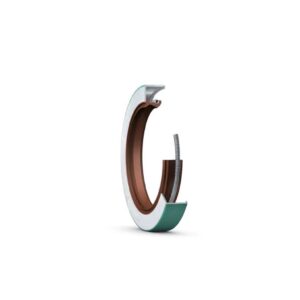
2.2 Seal Orientation
- Ensure the primary sealing lip faces the fluid/lubricant side. The spring (if present) must be on the lubricant side.
2.3 Press-Fitting Procedure
- Tool Alignment:
- Use a mandrel or seal driver with an outer diameter (OD) slightly larger than the bore for flush seals.
- Position the tool perpendicular to the bore.
- Apply Even Force:
- Use a hydraulic press for large seals or a mallet with a ring driver.
- For bores near shoulders, use ring-type tools to prevent cocking.
- Protect the Seal Lip:
- Slide an installation sleeve over shafts lacking chamfers or with threads/grooves.
- Silicone seals: Always use sleeves; never press directly.
3. Automotive Wheel-End Seals (CR Scotseal Series)
3.1 Scotseal PlusXL Installation
- Hub Positioning: Lay the assembly flat or at a 45° angle; avoid direct spindle mounting.
- Pre-Lubrication:
- Lubricate the inner bearing cone, seal OD/ID, and bore lightly with retained fluid.
- Hand-Press Installation:
- Push the seal evenly into the hub.
- Use a rubber mallet gently if needed.
- Rest Period: Allow the seal to settle for ~5 minutes before reassembly.
3.2 Scotseal Classic Installation
- Hub Preparation: Clean the bore thoroughly and position the hub flat or at 45°.
- Tool Setup:
- Insert the SKF seal driver with a centering plug into the seal.
- Driving the Seal:
- Strike the driver handle firmly with a hammer until the seal seats squarely (listen for a sound change).
- Verification: Ensure the inner bearing rotates freely and the seal packing moves without resistance.
3.3 X-Treme & Pro Seals
- Surface Preparation: Clean the bore, remove burrs, and pre-lubricate bearings and seal lips.
- Press & Align:
- Seat the seal evenly using a rubber mallet if needed.
- Follow TMC RP618 guidelines for spindle nut installation and end-play adjustment.
- Re-Lubrication: Fill the hub via the center fill port until the level window indicates proper lubrication.
4. Post-Installation Checks & Troubleshooting
4.1 Final Inspection
- Seal Seating: Confirm no gaps exist between the housing and seal OD.
- Lip Integrity: Check for twists or damage; rotate the shaft manually to test smoothness.
- End Play (Wheel Seals): Verify adjustment per TMC RP618 using a dial indicator.
4.2 Leak Testing
- Inspect for leaks under pressure before returning the equipment to service.
4.3 Common Issues & Solutions
- Cocked or Damaged Seal: Discard and replace immediately.
- Dry Installation: Always pre-lubricate to prevent lip tearing.
5. Safety & Best Practices
- Temperature Considerations: Warm seals to ~50°C (122°F) in cold environments; avoid open flames.
- Tool Handling: Use drivers that contact the seal’s metal case, not the elastomer.
- Documentation: Consult SKF manuals for model-specific guidelines.
By adhering to these guidelines, you ensure maximum efficiency and durability of SKF CR Seals. Always prioritize manufacturer specifications for specialized applications.
Leave A Comment